Introduction
MSBuild is a build and publishing platform from Microsoft designed specifically to make compiling and deploying .NET-based applications easier. It’s pretty simple to create a Beanstalk deployment solution for your .NET or ASP.NET application which this guide will take you through.
For this tutorial, we’ll create a “build” server for your application to deploy your Git repository from. It’s not strictly necessary to have a separate physical server from your application or web server. You can use the following steps directly on your production server if you like.
Creating an MSBuild Script with MSBuild
When you run a .NET application from Visual Studio, you’re actually invoking MSBuild first to compile it. You may also use a variety of other build and script tools such as Ruby with Albacore or Nant. For our purposes today, we'll use MSBuild since that is included with the .NET SDK. Our goal will be to create a build script that, ultimately, can be called from the Beanstalk Deploy feature to deploy your application.
Here is a sample MSBuild script for building and deploying a simple ASP.NET MVC application to a local folder. Name this file 'deploy.proj' and add it to your repository.
<?xml version="1.0" encoding="utf-8" ?>
<Project DefaultTargets="Build" xmlns="http://schemas.microsoft.com/developer/msbuild/2003">
    <PropertyGroup>
        <Configuration Condition=" '$(Configuration)' == '' ">Release</Configuration>
        <SolutionName>MvcApplication</SolutionName>
        <SolutionFile>$(SolutionName).sln</SolutionFile>
        <ProjectName>MvcApplication</ProjectName>
        <ProjectFile>$(ProjectName)\$(ProjectName).csproj</ProjectFile>
    </PropertyGroup>

    <Target Name="Build" DependsOnTargets="BuildPackage;CopyOutput" />

    <Target Name="BuildPackage">
        <MSBuild Projects="$(SolutionFile)" ContinueOnError="false" Targets="Rebuild"
        Properties="Configuration=$(Configuration)" />
        <MSBuild Projects="$(ProjectFile)" ContinueOnError="false" Targets="Package"
        Properties="Configuration=$(Configuration)" />
    </Target>

    <Target Name="CopyOutput">
        <ItemGroup>
            <PackagedFiles Include="$(ProjectName)\obj\$(Configuration)\Package\PackageTmp\**\*.*"/>
        </ItemGroup>
        <Copy SourceFiles="@(PackagedFiles)" DestinationFiles="@(PackagedFiles->
        'c:\deploy\$(ProjectName)\$(Configuration)\%(RecursiveDir)%(Filename)%(Extension)')"/>
    </Target>
</Project>
This MSBuild file, when invoked, will compile your .NET application and publish it to your c:\deploy\MvcApplication folder. This is a simple example, you may want to create a build script that copies to another server or creates folders based on date and time to have revision folders to deploy to. Be sure your build file is added to your Git repository.
Making a “Build” Server
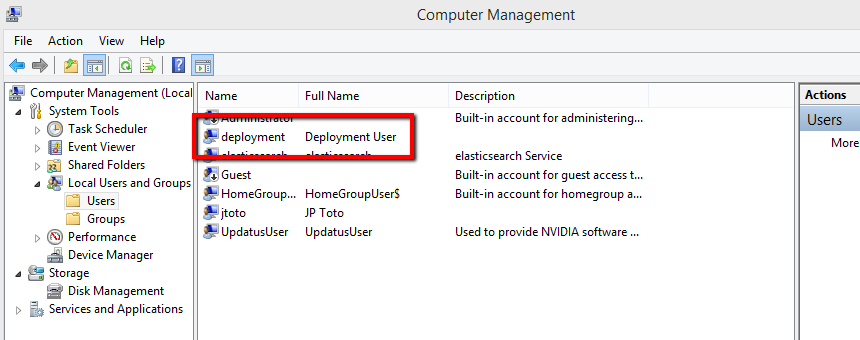
Creating a Deployment User
For Beanstalk Deployments to log into your server, we should create a “deployment” user. Use your server’s user manager to add a new user called “deployment”. You may need your network administrator to create this user for you as it requires administrative access.
Installing an SSH Server
In order for Beanstalk Deployments to deploy your application, it’ll have to have access to your server to kick off the new build script. The simplest way to do this is to use SSH. This way, we can setup a Deployment on Beanstalk to log in to your server and invoke the build script.
Since Windows Server does not include this functionality natively, we’ll install a third party server. Bitvise makes an excellent SSH server called WinSSHD (free for non commerical use). Download the Bitvise installer here and install it on your build (or production) server. You may need elevated or Administrative permissions to do so.
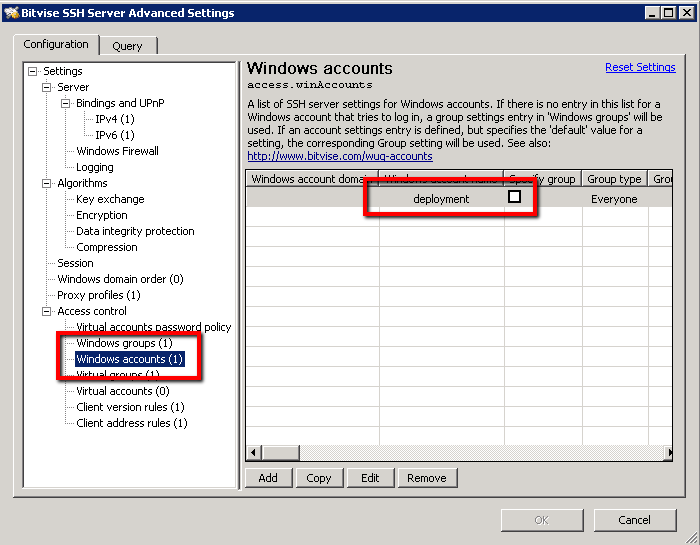
Once installed, open the WinSSHD settings. Here you may configure which port to use for your SSH server (default is 22) and which users can log into the system. Go ahead and add your “development” user to the user list of allowed logins. Save your settings and start the service. Make sure the port you’ve chosen to run WinSSHD on is open and routed at your firewall.
To test the server, try logging into the server over SSH:
ssh deployment@your.ip.or.domainFinally, be sure the “deployment” user has access to copy files to where you’d like them deployed. In our example case, the compiled files will be deployed to c:\deploy\MvcApplication.
Setting up Beanstalk Deployments
Creating an Environment
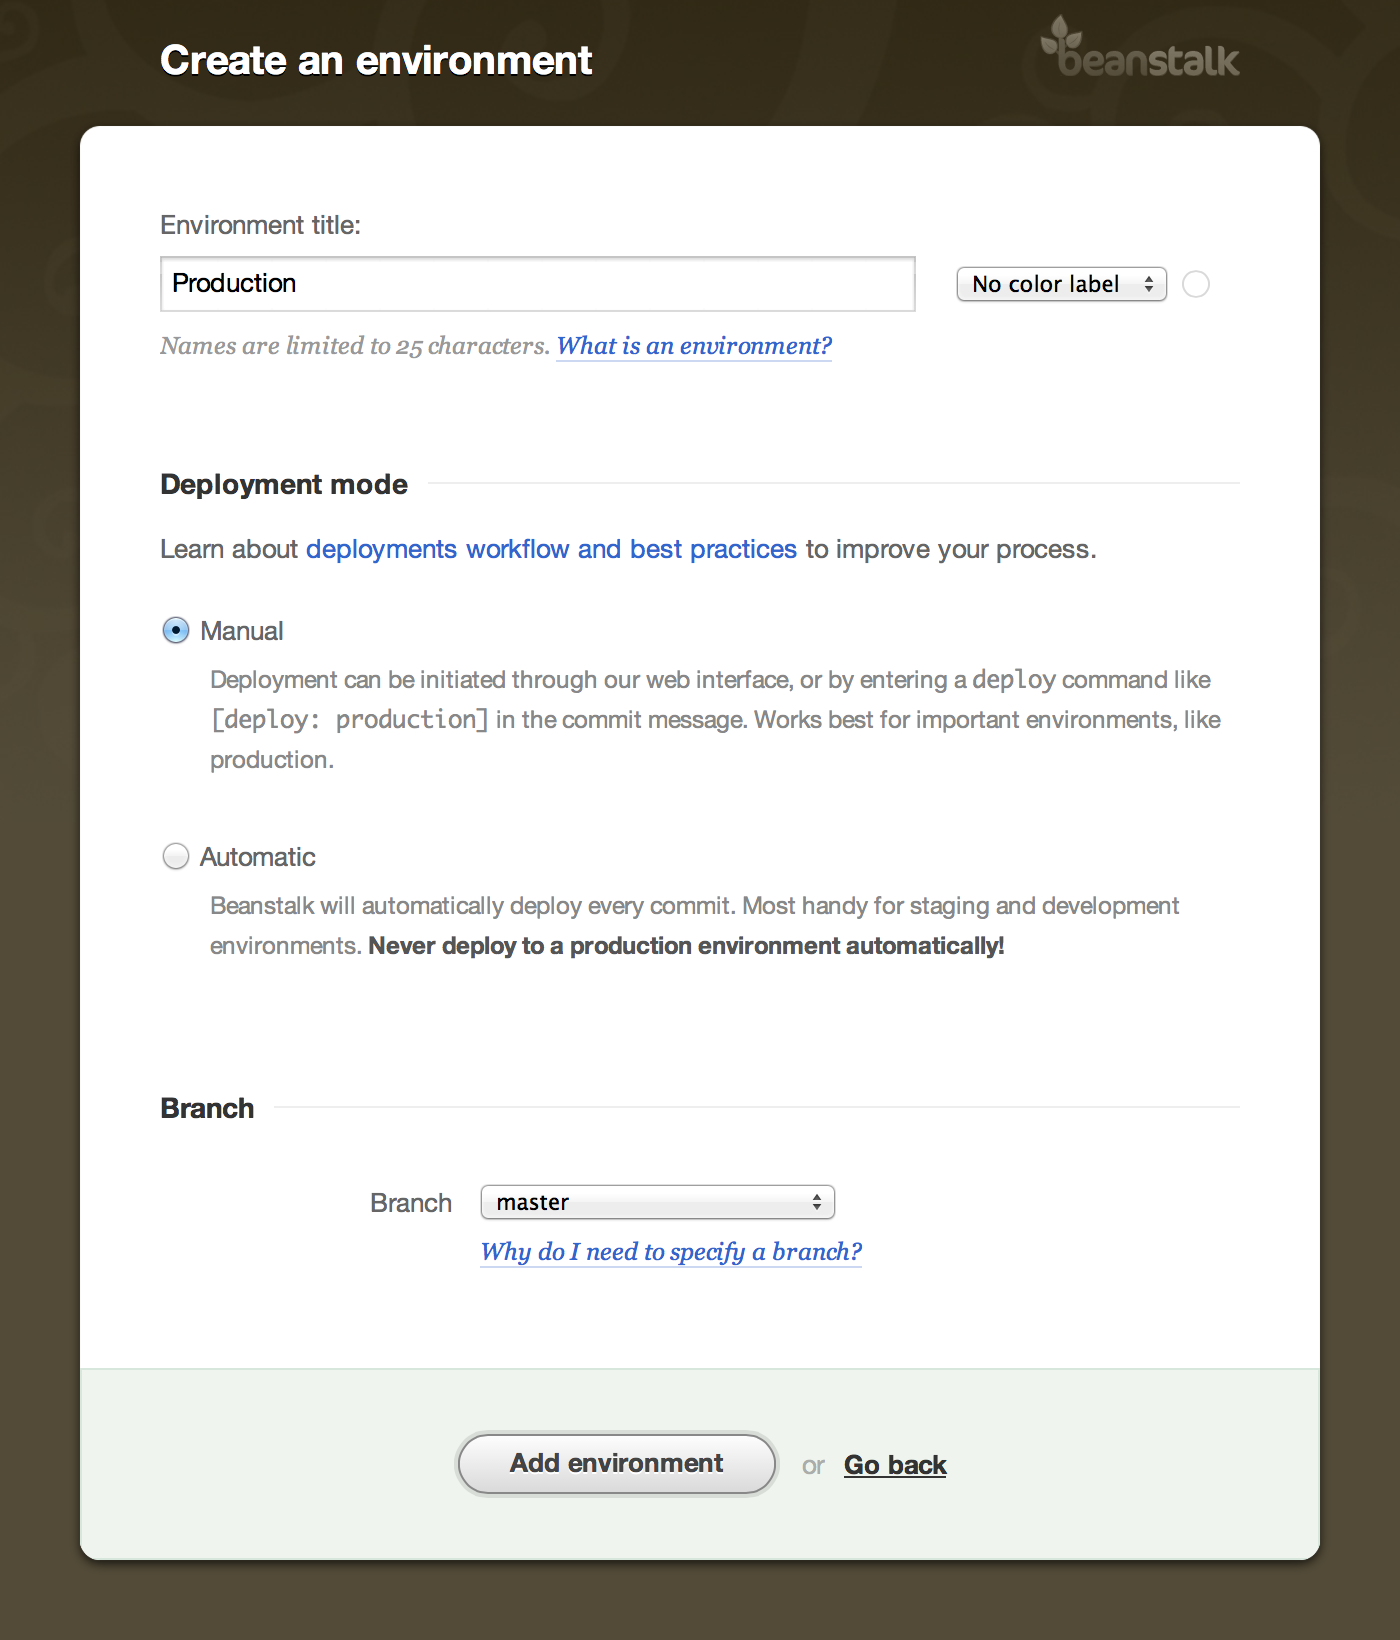
Log in to Beanstalk and go to the Deployments tab of your repository. Click “Add Environment” to get started setting up your environment. An environment may be “staging”, “production”, “QA”, or any other logical separation of servers for your application. Let’s create a “Production” environment. Again, this is just the name of your environment. It dosn’t necessarly mean those are production, staging, or test but semantically, you should name your environments something that will make sense to your team.
In the example below, you’ll notice that you can choose Manual or Automatic Deployment Modes. For now we’ll choose 'Manual' which means we invoke a deployment directly from Beanstalk. You may also use Automatic but we don’t recommend that for production environments.
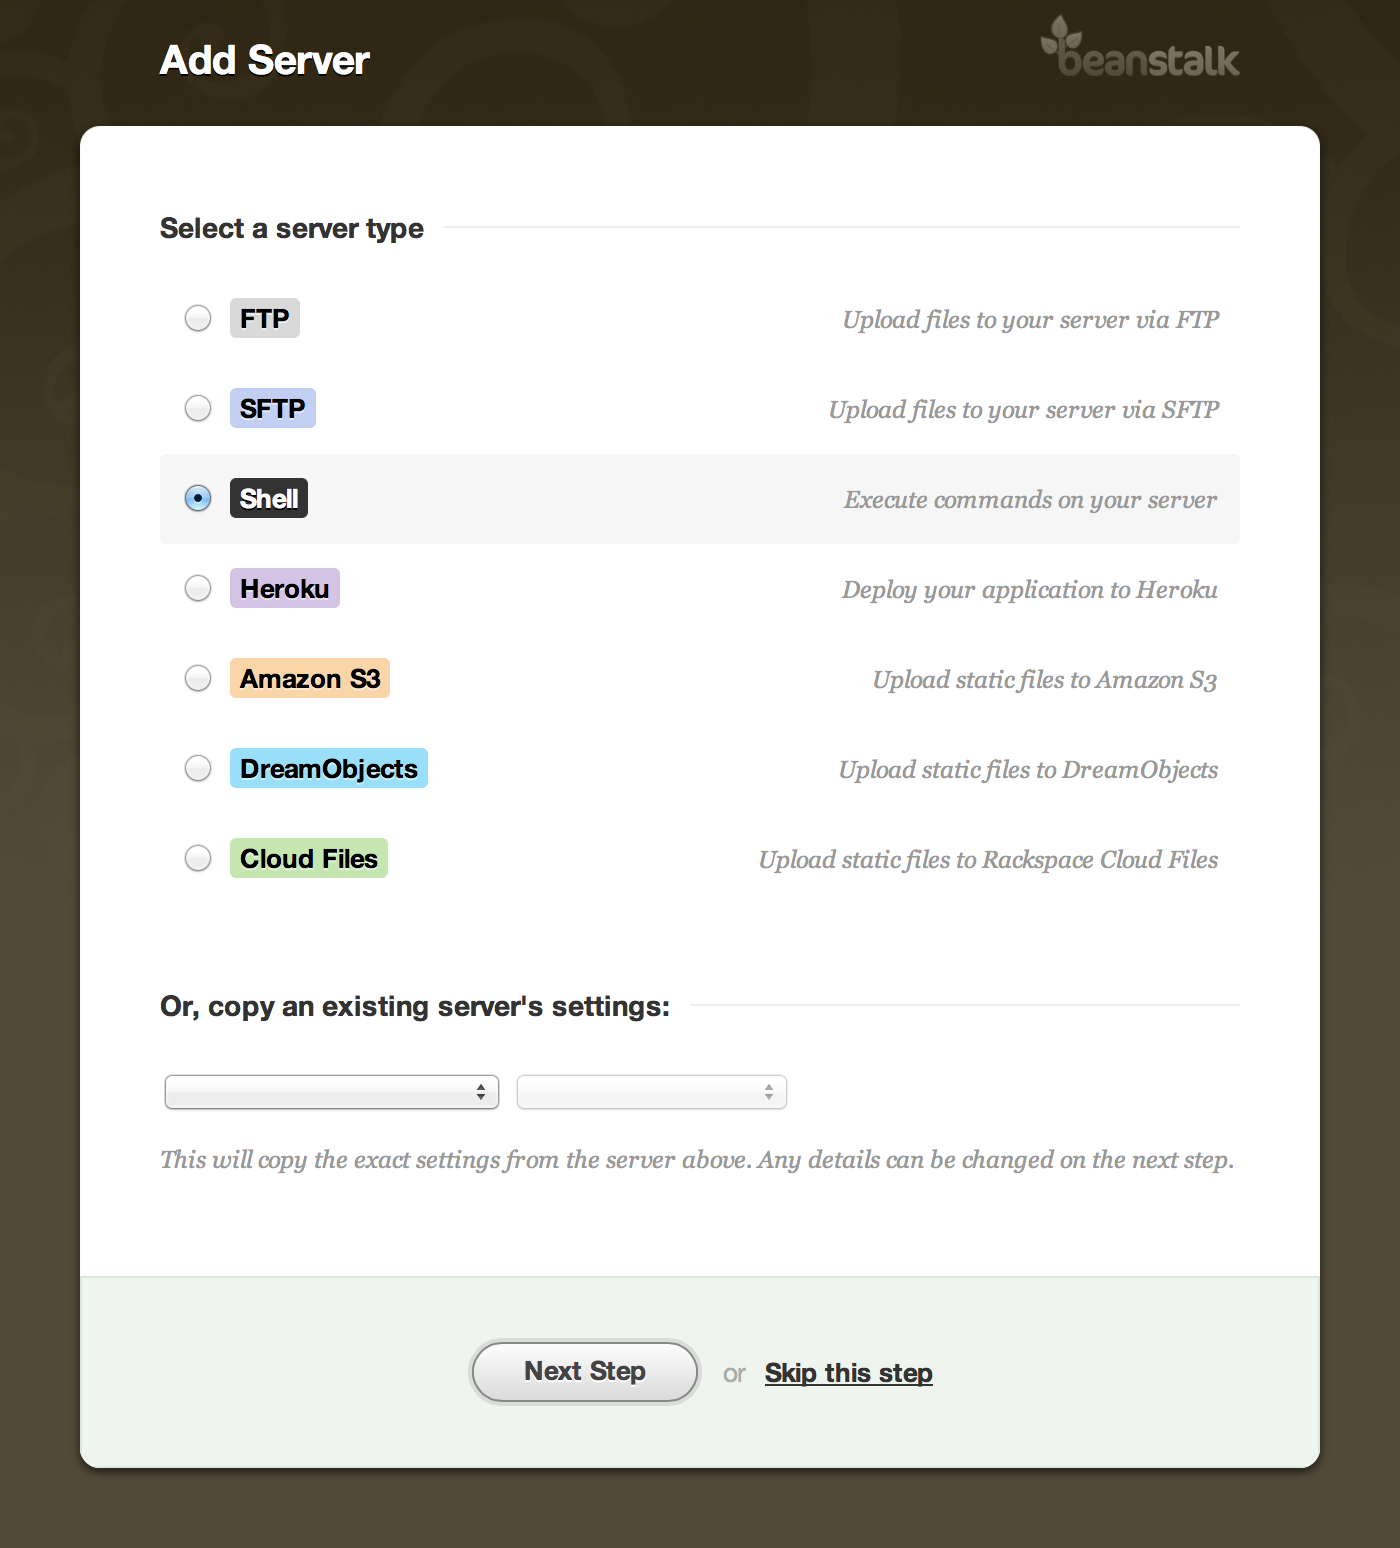
Creating a Server
Since this environment has no Servers in it, Beanstalk takes us directly into adding our first Server. For Server Type, select "Shell".
Server Credentials
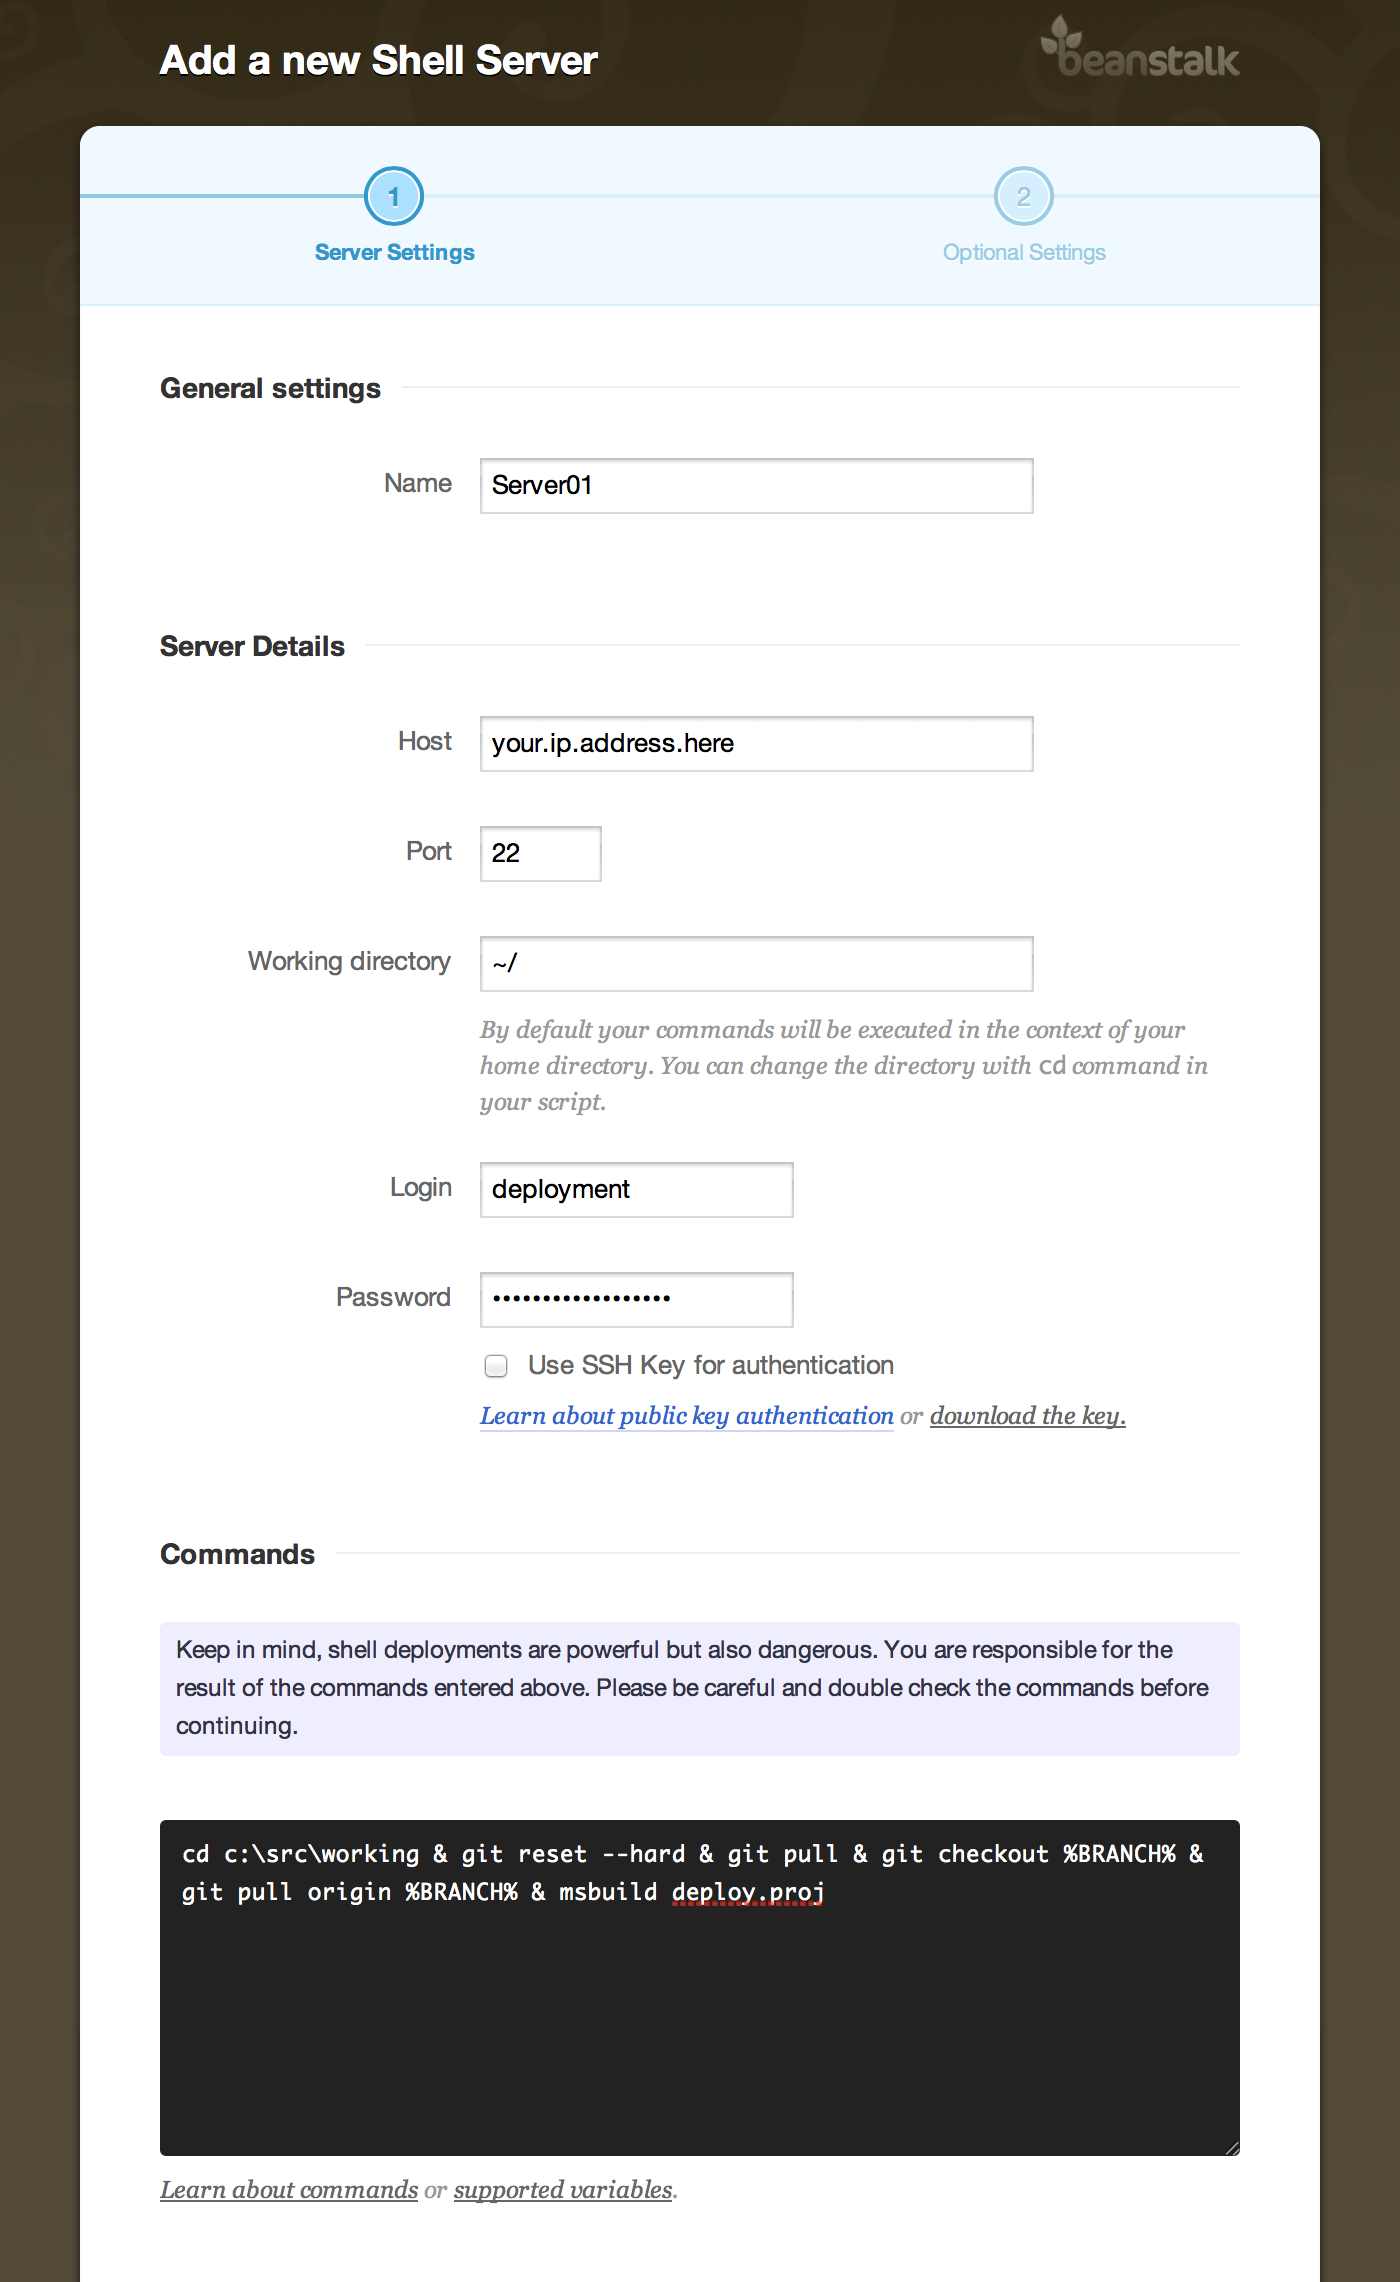
On the next screen, we’ll name our server, add our login credentials (remember that Windows “deployment” user we created?), and give Beanstalk the commands we want to run to deploy our application.
Commands
The Commands Window needs some special explanation. After Beanstalk logs into your server via SSH, it issues the following commands, concatenated together into one line. (SSH issues one line of commands per session but we can work within that)
cd c:\src\working & git reset --hard & git pull & git checkout %BRANCH% & git pull origin %BRANCH% & msbuild deploy.projLet’s break these down by command:
cd c:\src\working– Changes our working directory toc:\src\working. Modify this as needed to point wherever you’d like your repository to get cloned to.git reset --hard– Remove any untracked or modified files from our repository, giving us a clean working environment.git checkout %BRANCH%– Checkout the branch you want to deploy. %BRANCH% is used by Beanstalk and matches whatever branch you chose in your Environment setup.git pull origin %BRANCH%– Get the latest version of the code.msbuild deploy.proj– This calls our build script! Now our project will be compiled, built, and deployed to the location specificed in your build file.
Verification & Completion
On the next screen, Beanstalk will attempt to log in to your server to verify the credentials. If all goes well, you’ll move on to the final screens. Next you will be offered the chance to add “web hook” URLs for events that happend during deployment. We’ll skip this but you can go back and edit these at any time.
Your deployment configuration is now complete! You can test your deployment setup by triggering a “manual deploy” from the deployment menu. Depending on your application setup, you may need to experiment with file system permissions on the Windows server, add more build options to your build script, or add more commands to the Beanstlk Commands window for SSH to execute.